When I first started my 2M EME experiments elevation and azimuth control of the antenna was done manually, using a “plumb-line” and protractor for elevation and circular protractor for azimuth. The antenna was held in position with “G-clamps”. This system worked and had the added benefit of keeping me fit running between the shack and antenna every 15 minutes 🙂
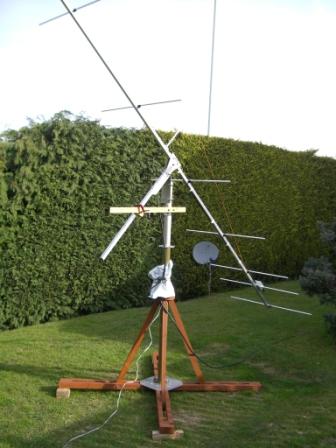
This “armstrong” method was eventually replaced with a Yaesu G-5500 providing both elevation and azimuth control. This allowed me to have full control from the shack and to move the antenna and plot position vs noise – the subject for another page!
Having got used to the G-5500 the next challenge was how to automate the antenna tracking. I spent a long time researching what people were using. I needed the hardware to interface between the Shack PC and the G-5500 and software to “drive” the G-5500. It soon became apparent that there were many solutions available with some excellent hardware / software solutions. These solutions vary in complexity and cost.
Ted, G4ELM had sent me some information on the Arduino and details of a power meter project he was building; this sparked off some interest in the Arduino especially when he sent me details of a rotator controller project! That was it – decision made, I would construct an Arduino based interface based on the excellent work published by “Radio Artisan” K3NG. The following photos and text describe the construction of the interface followed by my choice of software.
The Arduino Based Interface
The complete interface comprises of 4 modules, the purchased Arduino Uno board, the switching board, the LCD interface plus a 2 x 20 LCD module and emulates the Yaesu GS-232A / B interface. It is a self contained unit that is powered via the USB connection, there is provision on the Arduino board for power to be provided via a small external PSU if needed. The only other connection is to the standard 8 pin DIN socket on the back of the G-5500 for external control.
I chose not to implement all the features supported in the original design, I felt that the buttons for manual control and overlap LED indicator were not needed for my EME application.
The switching board and LCD interface were constructed using vero-board and components from the junk box. They could have been combined onto a single board but I chose to keep them seperate as I initially had the interface functioning without the LCD unit.
Construction was very simple and everything went together well, on first switch on there was no smoke, and the rotator moved left and right, up and down. There was a problem however! The first attempt at rotating the antenna resulted in it elevating 🙂 that was down to me having two digital outputs crossed! I then spent time trying to work out why the “Up” command sent the antenna “Down” and “Down” sent it “Up”! I was convinced that my wiring was correct and it must be somewhere in the Arduino code – in the end I couldn’t fault either and simply switched the connections… Very late that night I found on Google references to an error in some Yaesu G-5500 rotator manuals where the up / down pins on the rear connector were shown incorrectly – guess I have the bad manual!
Here is a photo of the test set-up showing the switching board and Arduino:

As you can see from the photo above the construction used components from the junk box and could have been made a lot smaller… I’d ordered the LCD module off the Internet but alas it was lost in the Xmas post, this unfortunately meant that there was an unplanned delay in getting the visual side working. The supplier did send a replacement and it all worked out in the end. I hadn’t really realised just how many different LCD modules are available, so I decided on a 2 row 20 character backlit white on blue which I have to say looks good.
Here’s a photo of all four modules connected and working (the diecast box at the back is the PTT sequencer):

I have to confess that that the “boxing up” of a project is not the part I really enjoy. Once it’s all working I’m ready for the next project and as a result it was several weeks before I got round to putting it all together in a suitable box.
The next photo shows it all fitted into a 145 x 95 x 45 mm die-cast box. There are 3 connections on the back, G-5500 connection, USB to PC and optional external power source. The two blue plastic “tubes” are simply used to hold the LCD module in place so as not to have holes drilled on the front panel.
Internal view of the completed interface:

The interface works very well and the size of die-cast box means that it will sit neatly on top of the G-5500 if needed.
One of the concerns I had using an interface with a USB connection was the potential noise / birdies issues on 2m. Based on my experience I have not found this to be an issue using the Arduino and my method of construction.
Here’s the finished unit: I know it’s not painted! 🙂

Associated software
There are two additional programs required to make it all work:
- The code that runs on the Arduino
- The PC based program that tracks the Moon and provides GS-232A/B commands to the Arduino.
The code that runs on the Arduino is a “stripped down” version of the source code developed by K3NG and others. It was suggested to me that the code could be enhanced to actually compute the Moon positioning thereby making the interface a “complete” Moon tracking controller and not needing a potentially noise generating USB connection to the PC – something to look at in the future.
As mentioned previously there are many different tracking programs available, some are even free. I looked at several and in the end chose PstRotator.
PstRotator
I downloaded, tested and registered this program on New Years Day and have to say I am very impressed with this software. The support and communication I have had with Codrut YO3DMU has been excellent. I should also add that I have no association with PstRotator / Codrut other than being one extremely satisfied customer.
This software has many features, the key ones for me being:
- Worked seamlessly with the Arduino and G-5500
- Regular updates
- Excellent support
- Predefined Park position(s)
- Predefined stop limits both Az & El
- Remote control facility.
- Uses Moon position data from WSJT
There are many more features to get the latest information go to: PstRotator
The screen grab below shows PstRotator in operation.

This has proven to be an interesting and relatively low cost solution that works extremely well. The basic hardware and software components that link togeteher to make this work are:
PstRotator <> Arduino Controller Interface <> G-5500
Acknowledgements:
Anthony, K3NG for his excellent project. Codrut, YO3DMU for his comprehensive PstRotator software.

")
")